Mobile PHOTOGRAPHY
Mobile photography is the art of photography using a smartphone or any other mobile device. Defined using the philosophy of 'the best camera is the one that's always with you', it's the most simplest type of photography, you can do it anywhere as long as you have a mobile device with you, it can be of anything surrounding you. Something as simple as a 'Selfie' (self portrait) would be known as mobile photography.
app reviews
Retrica

"Want to take amazing photos? Stand out from the crowd - make your photos POP! Retrica will transform your photo experience into something truly memorable. Choose how you want to remember that great view from your trip, or that delicious meal you shared with a friend. With Retrica’s live filters, you can preview how your photos will look, before you even take the photo!"
I think the description just about sums it up, this app is packed with ways to make your pictures stand out from the rest. It has a wide range of filters adding that little bit extra.
I'd use this app for any daily photographs, to add some colour or contrast to my pictures.
I think the description just about sums it up, this app is packed with ways to make your pictures stand out from the rest. It has a wide range of filters adding that little bit extra.
I'd use this app for any daily photographs, to add some colour or contrast to my pictures.
using the app
before |
after |
after-after |

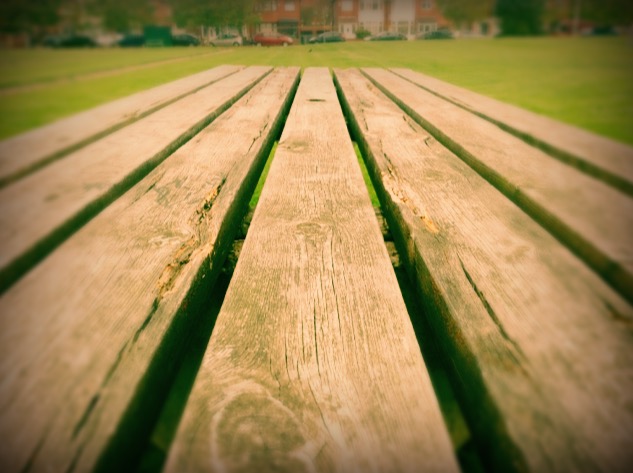
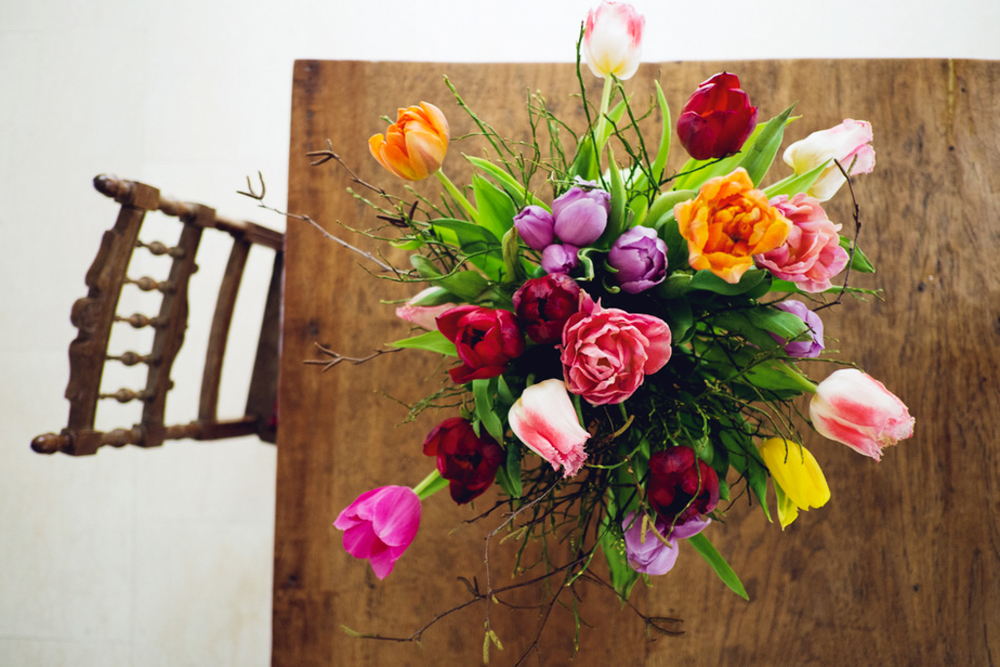
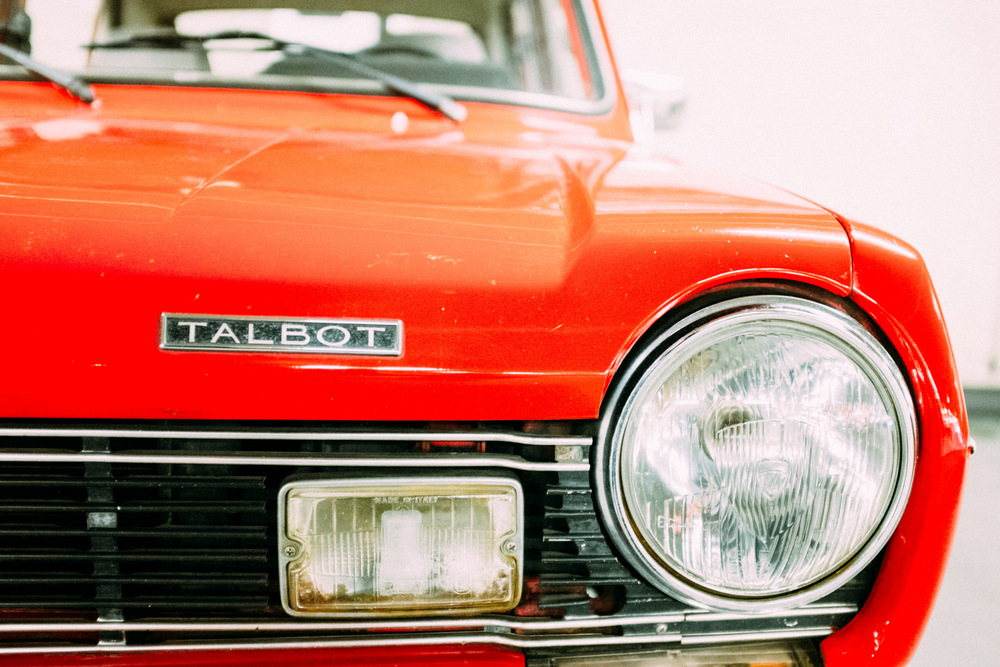
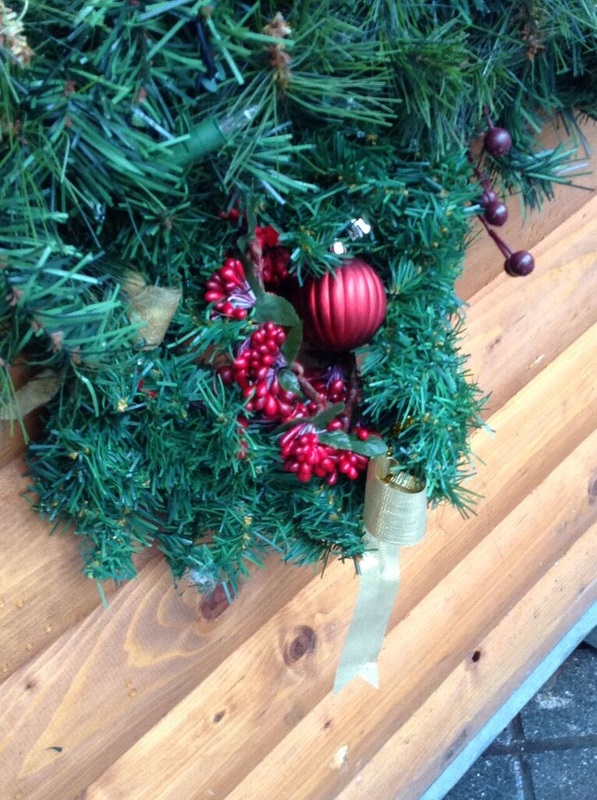
This the the original picture, I angled the camera as close to the table as possible, almost like a worms eye-view on the table. I picked this position because it seemed like a very interesting positon, making it seem like wood is 'shooting' out of the picture.
|
On this picture I added a 'Golden' filter, which just adds a tint of a yellow/gold giving it a slight happy, sunny day feeling, also I added 'vignette' which adds darkness to the edges. The outside of the pictures is slightly out of focus because I added a focus to the top-centre of the picture.
|
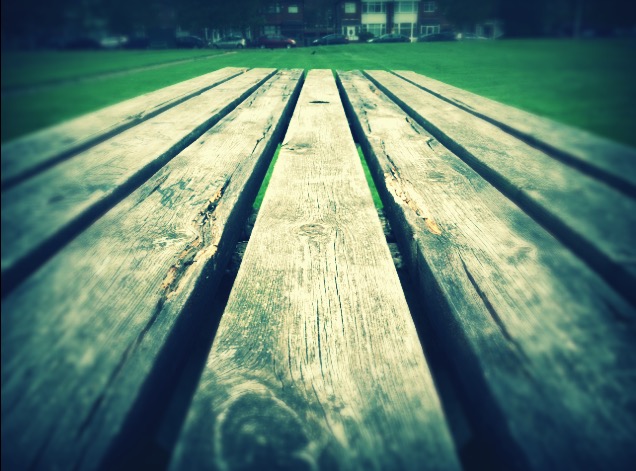
On this picture I added a 'Illume' filter with a concentration of 80% taking off some of the darkness. This picture is the opposite of the one beside, this one has a more darker side to it, like someones mood. I also added 'vignette' to this picture to add more darkness and focused the picture in the top-centre.
|
InstaEditor

"Features
- Enhance any photo with one-tap Magical Enhance filter.
- Adjust Brightness, Saturation and Contrast.
- Adjust Orientation, Crop and Sharpness.
- Red-Eye, Whiten and Blemish.
- Stickers, Drawing, Text.
- Ten beautiful stylistic effects to make your photos stand out. "
This app was very similar to normal phone/iPad editing, however, it wasn't very hard to control, the layout was very simple and didn't take much time to understand it. On the other hand, I wouldn't recommend it because it just doesn't make that much difference.
using the app
before
This is the original picture, I took this with the iPad placed on railing, which removed chances of camera shake, in this picture I included the buildings and not just the water, because I think that the building adds depth.
|
after
In this picture I edited it to look like it's almost night, like a romantic setting, I feel like it adds a dim light. The filter I used was called 'Dean' which added a dark shade of blue over my picture. In my picture the buildings are out of focus because I directed the focus on to the water in the far distance, to make the small waves from the breeze visible I increased the sharpness.
|
before After

This is the original picture I took, I placed the iPad on railings to avoid camera shake, the camera was up-right so that it could take in the surroundings. In the picture I included the nature surrounding the water because it adds more contrast to the picture.
|

In this picture I added a filter called 'Cruz' which adds a 'rose' type of colour, or a warm colour, I also placed the focus point on to the bridge because I wanted that to be the concentration of the picture. I took the sharpness down a bit to make the water look calm and peaceful.
|
Colour Splurge

Color Splurge is a photo editor thats Lets you Selective De saturation(Popularly known as selective coloring and recoloring Effect) and Colorize your photos and generate high quality images.No matter how big is the image it lets you generate the High quality output.It is fully integrated to social networks like Facebook.
Feature
1. Selective desaturation, check out the screen shots to find out what you can do with this app
2. Colorize ,pick the color you like and paint your photos, check out the screen shots to fell what you can do with this app.
3. Get the images from your Facebook Album, Facebook Profile Photo, Photo Album, and Camera
4. Upload your work to Facebook Albums, Phone Album, Email and Clipboard
5. Supports Undo with unlimited(until memory is full in your device) number of levels
6. Can save as many projects as you want
7. Multiple resolutions to choose while Uploading your images,check out the screen shots to fell what you can do with this app
8. Copy the image to the clipboard and use it where ever you want
9. Zoom In, Zoom Out and Pan using your two fingers, make your life easy to work to details of the image
10. Use the Brush size that works for you
11. Can see the brush tip while working on the image, so that it will be easy for you while working on the image
12. And it is free
This app is very easy to control, it gives you a tutorial video to make it much easier to use, this app is best used when trying to focus the colour on one specific aspect of the photograph. I'd recommend this picture to people trying to bring out the colour in something.
Using the app
before after

This is the original picture, I collected nine colourful buttons, placed them in an assorted pattern and then placed a newspaper underneath to add some sort of background.
|

I changed this picture by making some of the buttons colourless,
the only buttons I gave colour to are the ones that had the brightest stand-out, making the picture look bright, if I had to do something differently I'd remove the colour from the newspaper to make them stand out more. |
before after

This is the origanal picture, I gathered four bright, vibrant colours so that they would stand out and got a newspaper, I covered the tips of the paintbrushes in the paint and placed them on to the newspaper.
|

When I was editing I made the decision to only add the colour of the paint so that the vibrant colours were the only thing attracting attention.
|
before after

This the original picture, taken in the form of a 'Selfie' in other words, a self portrait. I used a bright yellow hoodie to make it extra bright, which is suitable to make the background black and white.
|

I spent time perfecting this picture to make only the yellow stand out, I was quite proud of the outcome because the colour is the very first thing you see, which was what I was aiming for.
|
ROBERT-PAUL JANSEN
"As I see it, tiny details can become single-frame fairytales"
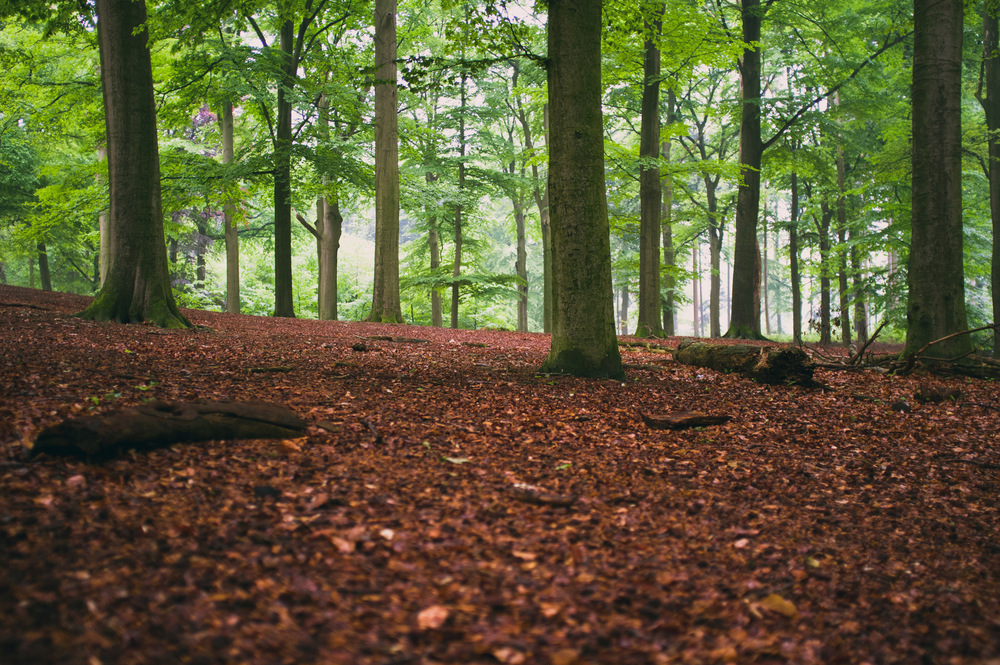
Robert-Paul Jansen is a mobile photographer based in the south of the Netherlands, he has three kids and a wife, he finds his passion about film photography, gadgets and gears the biggest, he started photography when he got his first iPhone 3G and then he started getting more and more into it changing the texture and visual appearance of the pictures . Throughout his work he combines nature, architecture and design. He says he was hooked on to photography from the start, which shows his determination. One of his main goals is to make people around the world aware of the things around them, that's one of the reasons I like his pictures, he makes simple things look big, I also like the lighting and texture of his pictures, they usually have a very calm, relaxing setting.
|
|
|
|
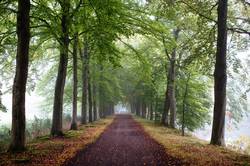
These are the 8 pictures I like the most, they all include a form of nature, expressing his love for nature in the best way possible. I personally like the third picture because of the colour contrast, I feel like it gives a calming feeling, the colours are very bright, perhaps he's trying to convey a message of happiness to us.
Misho Baranovic
Misho Baranovic is a street photographer who has been exhibited internationally in New York, Berlin, Paola, Italy, Sarcelles, France and Minsk, Belarus, he along with Oliver Lang are the founding of mobile photograph, which explores the photographs, cultures and communities created through the use of connected mobile devices. Besides being a photographer he is also a writer, Misho published his first eBook with Digital Photography School: iPhone Photography: How to Shoot, Edit and Share Great Photos. The eBook is a definitive guide on how to take creative control of the iPhone camera. Misho is available for teaching and speaking engagements. He has taught workshops on mobile street photography for the Monash Gallery of Art, NMIT, and EyeEm in Berlin.


These are the 8 pictures I like the most, the majority of Misho's work is of the streets and his surroundings, they all seem so simple, but they're all very good and seem like shadows have been taken into account throughout his photography, a lot of his pictures are also black and white. My favorite one is the fourth one because of how the bright colours are blending with the the dark blue sky.
Randy scott slavin
" When I began shooting landscapes, I was compelled to push the perspective"
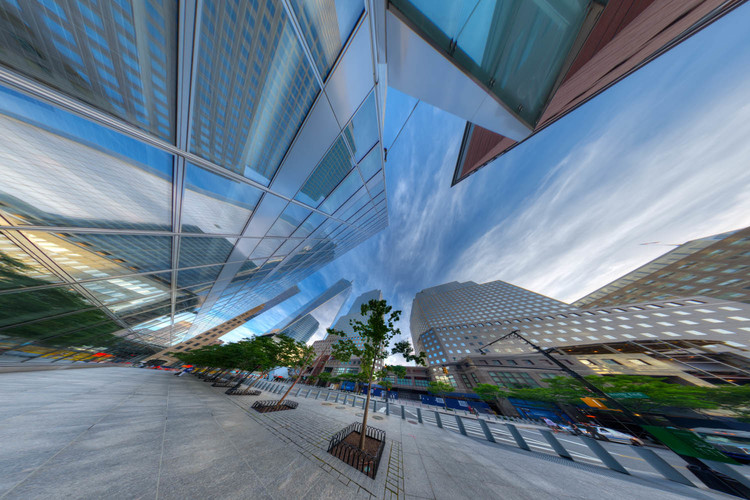
Randy Scott Slavin is an award-winning director and surrealist mobile photographer based in New York City. He is widely known for his powerful music videos and branded productions that mash up clever concepts with bold imagery, giving a two or more sided perspective of objects. His photography is not also very creative, but it provides us with something surreal.


|


|

|

|
I like these pictures because they're all very vibrant, they seem like they have been taken in another world, adding more meaning. My favourite has to be the eighth one because it looks like all the buildings are piling into the center.
shape, edges and shadows


manchester city centre
Architecture


Christmas in manchester


a splash of colour


cathedral shoot


manchester life


Perfection from all shoots

Cringe


edited
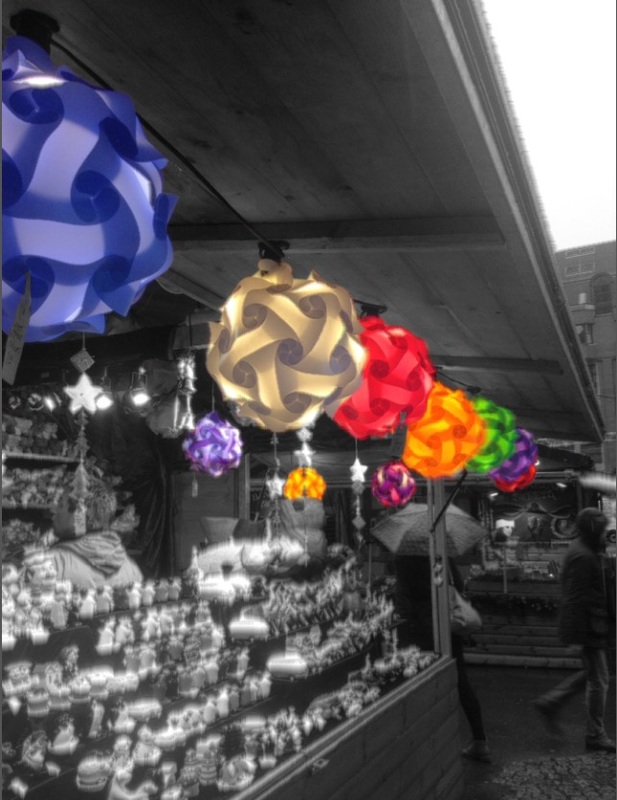
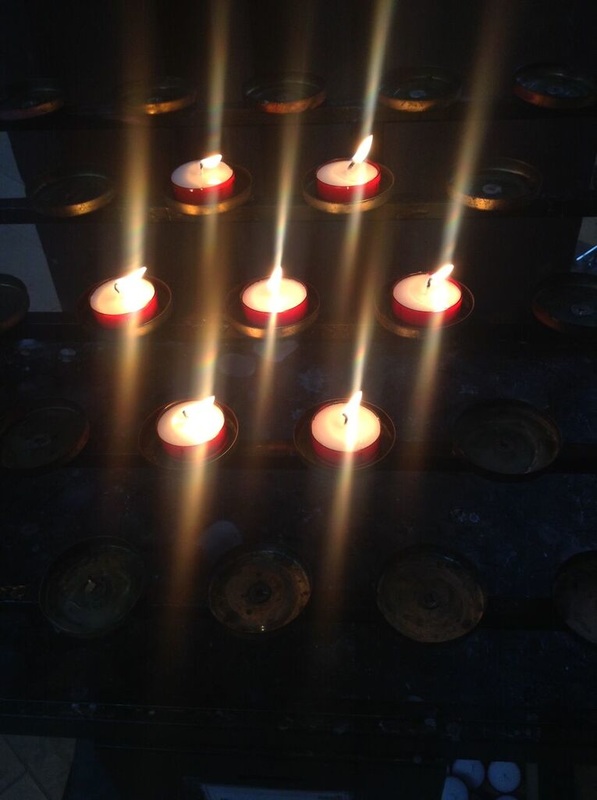
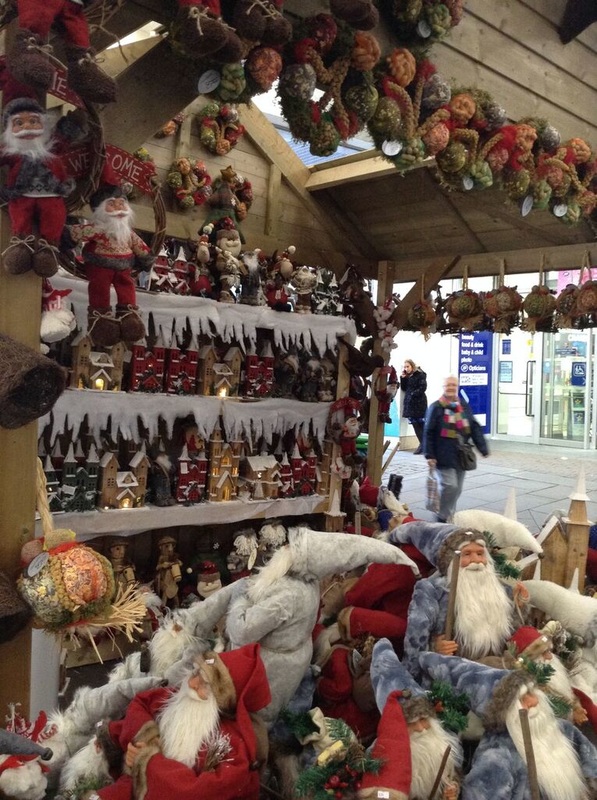
This photograph was taken at the Christmas Markets, originally it was full of colour, but I only wanted the ten light up decorations to stand out. Therefore I decided to make the whole picture black and white and then bring back the colour with the app called 'Colour Splurge'. After the editing the photograph I realised that I liked the original version more.

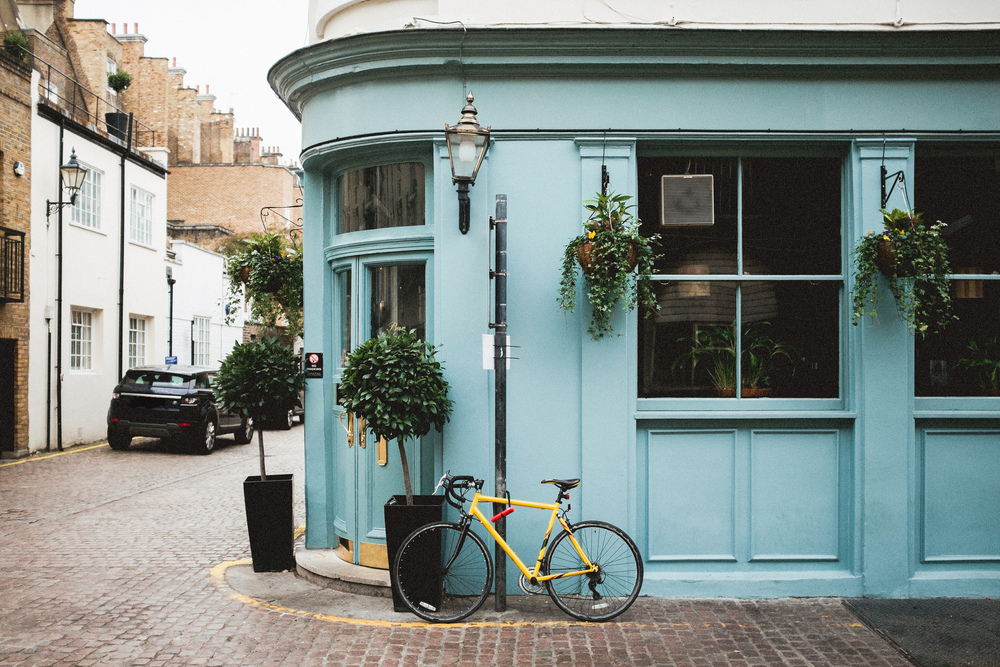
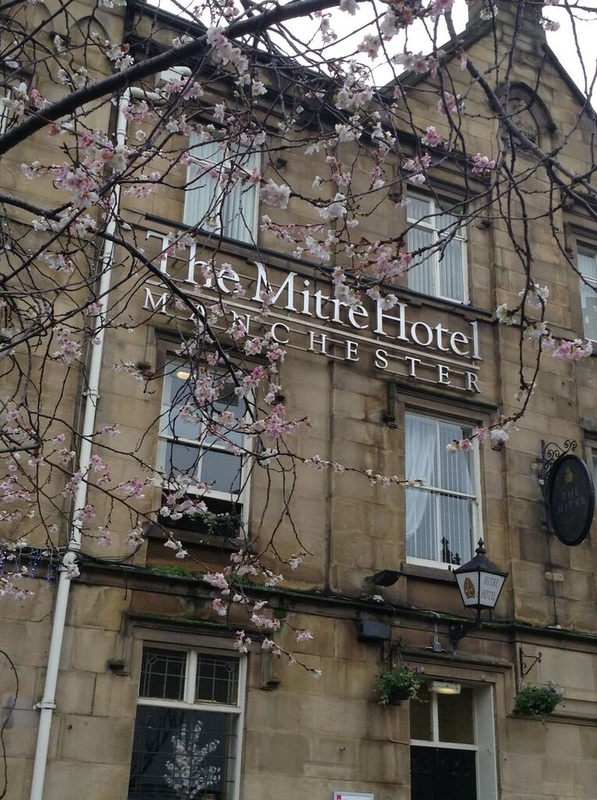
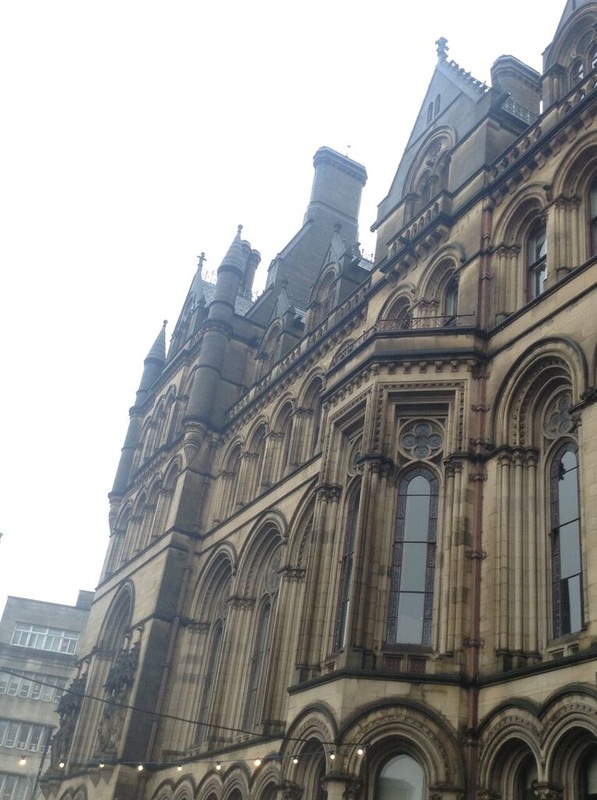
This photograph was taken opposite the 'Cathedral', to edit this photograph I used the app called 'Retrica' to add some filters, I used the filter called 'Sparkle' which defined the shadows and dark areas in the photograph, it also made the photograph look a bit 'old fashioned' or vintage, I then made the corners of the photograph darker using 'vignette' and set the focus point on the name of the hotel and where you could see the pink fluffy flowers blooming.
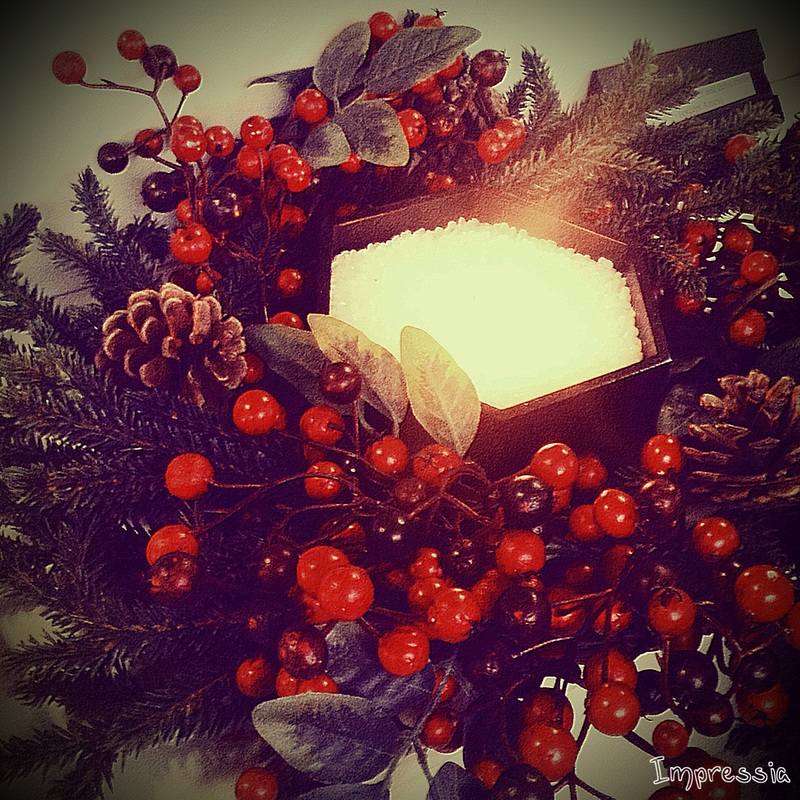
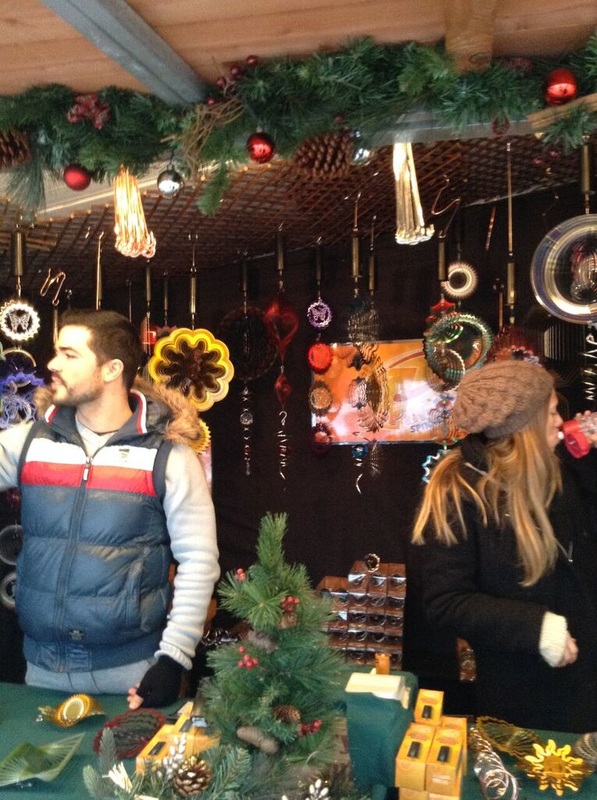
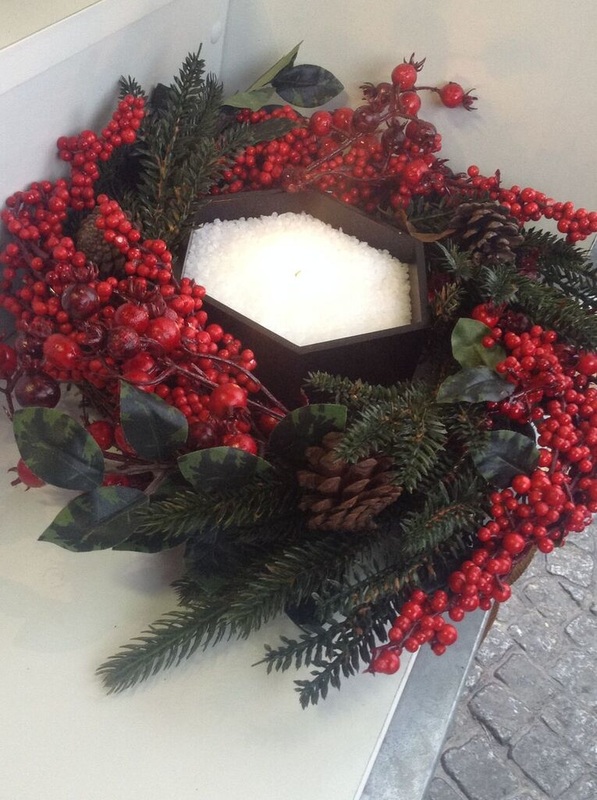
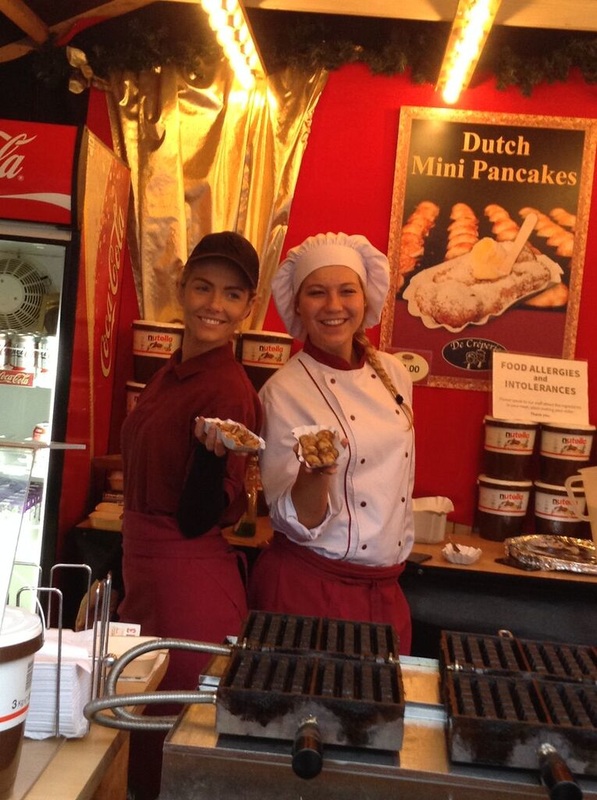
This photograph was taken at the 'Christmas Markets' at one of the stalls, I edited this photograph on an app called 'Impressia' and added a filter called 'stiller' which made the photograph look brighter. then using the same app I added some effects the app provided. I started by bringing the brightness and contrast down, but not too much., this made the features stand out, then I lifted the saturation up slightly along with the hue which gave the photograph a tint of red, which also gave off a Christmas feeling. to the corners of the photograph I added a vignette effect to make the corners a bit darker. In this photograph I wanted to make it look more like a painting than a photograph so I used an effect called 'emboss' which lifted parts of the photograph up to make it look painted.

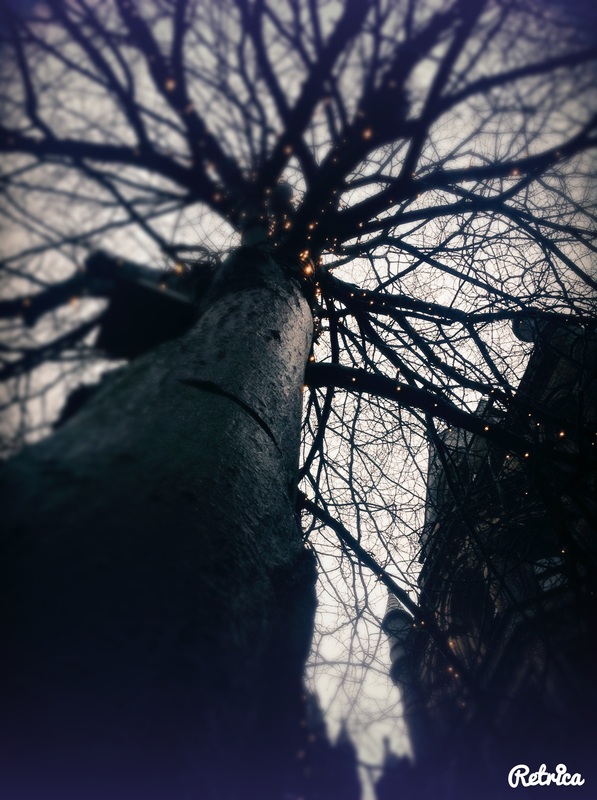

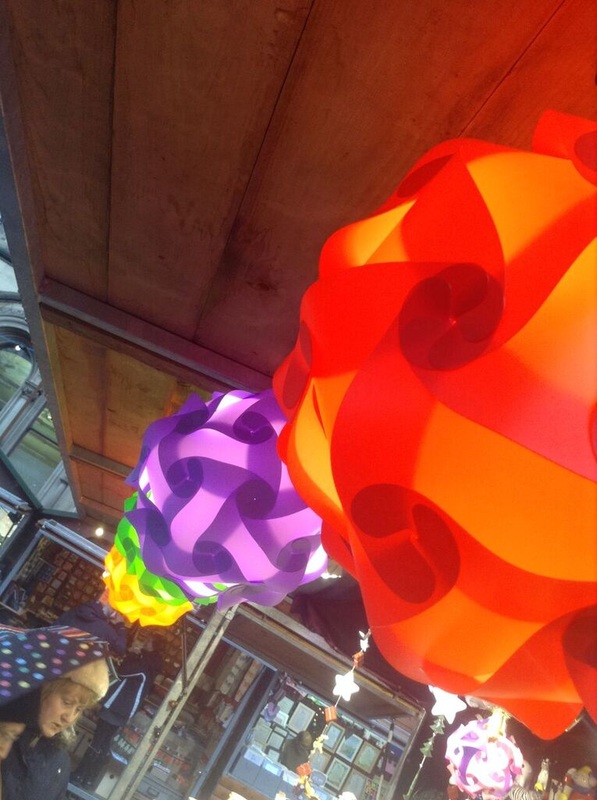
In these three photographs I added a mixture of filters using the app 'Retrica' as an experiment, I like how all three of them turned out.
evaluation
Mobile photography seems like it's an easy unit, you could go out and take photographs of anything, however, it was much harder than I thought, that could be because I was so used to using a camera. Even though I found it much more difficult doesn't mean I didn't enjoy it, I loved how we got to go out and explore it and use our own styles to take photographs in Manchester City Center.
